
Are you tired of
buttonhole stitch lessons yet?? Yes? Too bad, because I have another
one! 😈
Sorry, sorry, I know
there's been quite a lot of buttonhole this month, and I wasn't
planning on adding more today, to be honest. But I'm currently
preparing a practice piece I'd like to share with all of you, and
while I was stitching it, it dawned upon me, that there is an aspect
in buttonhole stitch that I didn't speak about yet – ending an old
thread and starting a new one. So I thought it would be better to
cover ALL possible questions now, to prevent any possible problems
and make the stitching process as joyful as possible :)
WHY I THINK IT IS IMPORTANT
We all want our stitching
to look neat and nice, and what I absolutely hate in my embroidery is
when I know that there is a place I'm not satisfied with,
which I wish I could do better. Other people might not even notice
that “defect”, but I know that it exists and it spoils the
pleasure I can possibly get from my work.
One of such things is
buttonhole ending-starting process. For quite a long time I used to
finish and end thread using anchoring stitches (I will explain it
below). And... it seemed to me as the natural and the “right” way
and I didn't even think about any alternative. But I didn't like the
look of it. The anchoring stitch was visible. It was apparent. It
wasn't supposed to be, though! Whenever
you start a new thread it's best to make it as inconspicuous as
possible for the smoother and complete look of the work.
So
another, inconspicuous way of starting a new thread, was an eureka
moment for me. You know, that kind of discovery that “you wish you
knew before”. That's why, even though this blog might get an
overdose of buttonhole stitch already, I will still persist on
telling you this tip!
So,
for starts, let's see the most common way of ending and starting
thread when you use buttonhole stitch.
METHOD ONE
As
I already mentioned in the post about buttonhole basics,
when we end the line we usually use a tiny anchoring stitch to secure
the last loop in the position we need. That's why, the most likely
way of finishing the thread you'd think of while working buttonhole,
would be the anchoring stitch, even if your thread ended in the
middle of the line.
So,
the process would look the following way:

Making
a tiny anchoring stitch.

Then
bringing the needle with the new thread in the same point where the
anchoring stitch started. And proceeding working buttonhole stitch
further – be it a line or a shape that needs to be filled.


The
thing is, that anchoring stitch is still visible. Yes, without a
close inspection in the pictures above it is quite hard to notice it,
but trust me, sometimes it can look worse and the joint will be more
apparent. Especially if you like using more than two strands of floss
when you stitch.
Don't
get me wrong, I'm not saying this method is “wrong” or “bad”.
I've been using this way of starting new thread for quite a while and
it does the job, but... it has its disadvantages.
Now,
if you prefer your embroidery to look smoother and have no visible
“joints” on the surface, then I suggest taking a look at the
alternative way of finishing thread:
METHOD TWO
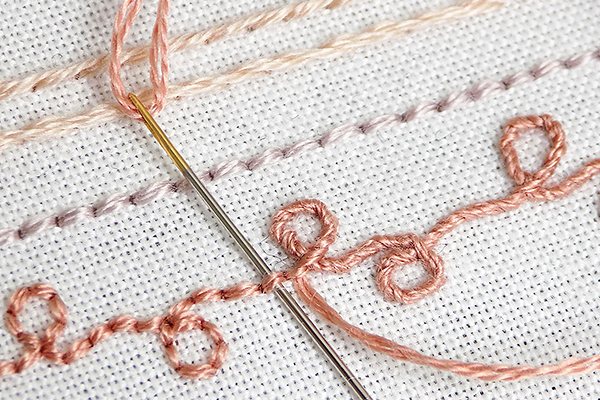
Now,
let's go back to the moment when we decided that it's time that
thread should be ended.

What
you need to do now is to remove the needle, while leaving the thread
hanging there, on the surface of your work. Note that the last point
where the thread was brought up to the front is inside
the loop, on the edge of the ground line of your buttonhole.

No
need in anchoring stitches! We just leave the thread hanging :)
Now, since the needle is free now, we thread it with new strand(s) of floss and bring it up in the same point where our old thread is hanging from.

Then
I recommend making at least one stitch with the new thread, while
putting the old one a little aside.
Now,
flip the hoop to see the back of your embroidery and pull the old
thread to the back of the work and secure it.
The you can proceed with working buttonhole stitch.


Because
there is no anchoring stitch, it looks as if there was no joint –
as if you keep working with the same thread.
From
the post it might seem that the second method is more bothersome, but
it's actually not! It's very fast to execute and has the benefit of
making your work a bit neater, so I really recommend at least trying
it out. Then you can decide which method you like more :) It can be
applied to any loop stitches, by the way: lazy daisy,
chain stitch, fly stitch and so on.
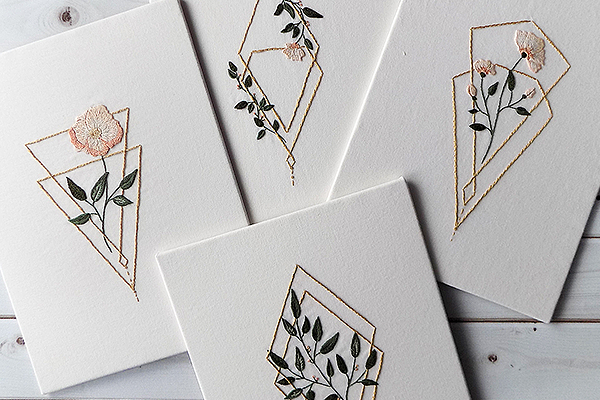
By
the way, the pictures above give a sneak peek into the practice
piece I'm preparing for the next post. The pattern will be available
for free and will help you train buttonhole variations
and filling the shapes.
You know what they say: “practice makes perfect” :)
See the rest of the lessons here:
If you missed other lessons on Buttonhole you can catch up on these links:


No comments
Write what you think! ❤
Note: Only a member of this blog may post a comment.