
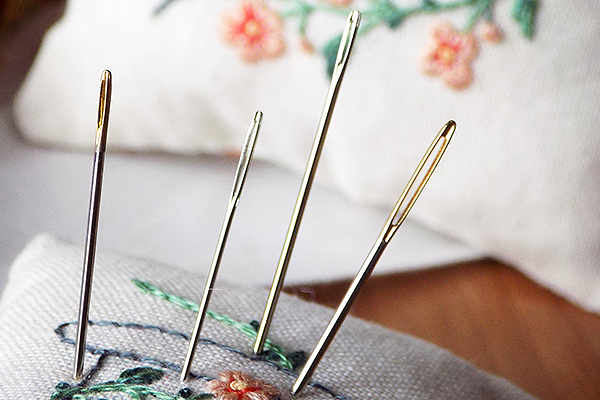
Buttonhole one of the basic stitches in hand embroidery which actually forms a whole family of loop stitches. It is really handy, so I strongly believe that learning it is essential for a needleworker.
Today we will speak about:
- the technique of how it is worked,
- its functions
- the confusion between Buttonhole and Blanket stitches
- the tips for getting the buttonhole stitch right.
HOW TO WORK BUTTONHOLE STITCH
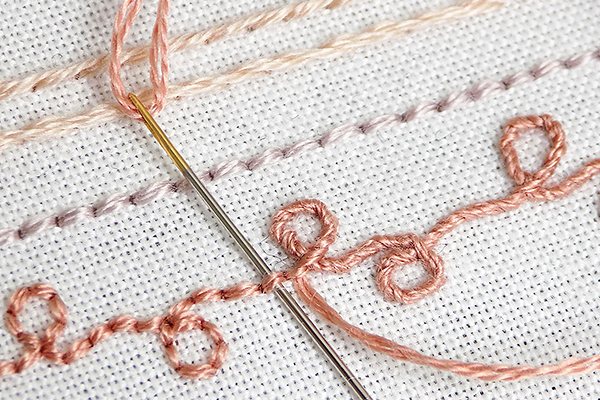
Buttonhole stitch is normally worked from left to right. When you work it, you need to imagine (or draw with an erasable(!) marker) two parallel lines, one above the other.

Bring the needle up through the fabric at point A which lies on the top line. Next, insert the needle back into the fabric at point B which lies at the bottom line slightly to the right from A. The needle must emerge from the fabric at C, which is lying on the top line directly opposite to the B.
When you finish the line of buttonhole stitch, make a small straight stitch to anchor the last loop and give a consistent look to the line.
Note the difference in the top line and bottom line in the ready stitch. The top line is "closed" while the bottom one is open, right? The top line is also referred to as "foundation line".

There is a whole variety of ways you can adjust this basic buttonhole technique to achieve different looks. For example, try to change the spacing between the stitches – make the gaps wider or place the stitches closer to each other. You can also play with the length of stitches like in the picture above. Actually, why don't you make the top line more “wavy”? Experiment and practice, I'm sure you will find a lot of exciting ways to add something new to the basic look of the buttonhole stitch :)
TIPS:
- When working buttonhole stitch I find it more convenient to use sewing method of embroidery rather than stabbing, because the needle, as it emerges from the fabric, forms a perfectly straight line for the stitches.
- To make your buttonhole consistent follow the top and bottom lines carefully and try to place the stitches at an equal distance from each other. It is easier to do on evenweave fabrics like linen and Aida.
- If the fabric you are using is not evenweave you can draw two tiny vertical lines on your thumb, measuring the distance between the stitches, and then apply it as you stitch.
- Be careful with the tension of thread when you pull the thread through – stitches should lie on the surface of fabric comfortably, but not too loose.
FUNCTIONALITY
In surface embroidery, buttonhole stitch is often used for working lines and outlining the elements of embroidery designs. It can be worked on a straight line or along the curves and is a popular choice for completing borders and festoons. It can also be used for filling the shapes – something we will touch on in one of the next lessons.
Well, many stitches have the same functions. However, there is a special use for buttonhole stitch and that is edging.
Buttonhole stitch is commonly used for finishing the edges of the fabric, including wooly felt and fleece. You might have noticed the pictures of lovely blankets which have buttonhole stitching on the edges. That's actually where one of its names – blanket stitch - comes from.

Another use for buttonhole stitch is finishing the edges of fabric applique to prevent them from fraying. In this case, when you work buttonhole stitch, the needle should be emerging slightly outside of the cut fabric element. Thus, the foundation line is on the outer side.
For the same purpose – preventing the edges from fraying – buttonhole stitch is used in the cutwork, open work and stumpwork embroidery which require cutting out some elements and shapes from the fabric. In this case, the foundation line sits along the side which will be later cut out.
BUTTONHOLE OR BLANKET STITCH?
And now, a revelation which might really confuse you. Buttonhole stitch and blanket stitch are actually different. And the technique described above is actually.... for the blanket stitch, not the buttonhole one.
Gasp! What does it even mean?? 🤔
The thing is... Some time ago needleworkers used to differentiate the two stitches: blanket stitch and buttonhole stitch. And the one we speak about in this post was actually referred to as blanket stitch. The original buttonhole has a slightly different look and is worked in a different way – you can get a good understanding of it from this tutorial by Sarah. This article can also be helpful.
However, with time, the names somehow merged together and now the stitch we are talking about today is mostly referred to as “buttonhole stitch” or “buttonhole/blanket stitch”. When the things changed is not clear, because even the encyclopedias from 19th century refer to the stitch as "buttonhole".
The reason I refer to this stitch as buttonhole is that currently there exists a number of its variations and all of them feature the “buttonhole” name: closed buttonhole, crossed buttonhole, knotted buttonhole, up and down buttonhole etc. So... I think it would be strange to refer to this stitch as “blanket stitch” but call all of its variations “buttonhole”.
I guess, hand embroidery, as many other crafts, walks in the direction of simplifying the terminology. I don't really find it something negative or bad, but it's a pity for me that the original buttonhole is sort of lost now.
So, that's where we will stop for now. You can see my buttonhole in work in the Crewel heart and in this tutorial for buttonhole edging with picot. And next time we are going to touch on the buttonhole variations: closed, crossed, knotted and up and down versions of it. So look forward to the second lesson :)


im just starting embroidery, and this is just what i need!! very informative. love it, thank you !!
ReplyDeleteI've just picked up a supper cloth that I started over 30 years ago and I just couldn't remember how to start the buttonhole stitch. Your lesson brought it all back to me. Thank you so much
ReplyDelete